How To Fix Audio Cables
When you work with live sound, you're going to deal with a lot of different audio cables.
And sometimes those cables break.
The most common cable problem can actually happen inside of the connectors at either end of the cable where individual wires can become physically detached from the connection points.
This can happen for several reasons, but here are the 3 most common causes:
- The cable was pulled or bent in a way that the strain relief inside the connector gave way and one or more conductors were pulled loose from the connector.
- An instrument cable (guitar cable) was used as a speaker cable (stage monitor) and the high power from the amplifier circuit caused the center conductor of the instrument cable to disintegrate, losing connection with the “tip” of the 1/4" plug on one end of the cable.
- Cables that are cut, pinched, or rolled over (by a piano or speaker cabinet most of the time), or otherwise physically damaged along the length of the cable – this should be quite visible in some cases, but other times, as in the case of a piano rolling over a cable, the small conductors inside a cable can be smashed together, creating an electrical short circuit.
Preventing these kinds of damage to your cables can be as easy as practicing good organization on and off the platform:
- Tape down cables in high traffic zones with quality Gaffer's Tape
- Keep cables neatly coiled in storage or wherever there is slack on stage. Use Velcro straps to keep things organized.
- Use the right cable for the right job (e.g. not using an instrument cable as a speaker cable)
Here are the simple steps to follow if you find a bad audio cable.
- Visually inspect the ends of the cable to see if you can determine where the bad connection may be. If this is not easy to determine (as is often the case), you have a 50/50 chance of selecting the end that is bad. Flip a coin!
- Some XLR cables will require a small screwdriver to loosen the connector and strain relief components. Switchcraft XLR connectors feature this type of configuration. The popular Neutrik XLR connectors do not require a screwdriver, and feature a twist-on cable clamp component. Neutrik Speakon® speaker connectors will also require a small screwdriver or hex wrench to loosen/tighten the individual conductor screws. Standard 1/4" phone plugs and other connectors rarely have screws, and the barrel can easily be unscrewed for quick inspection.
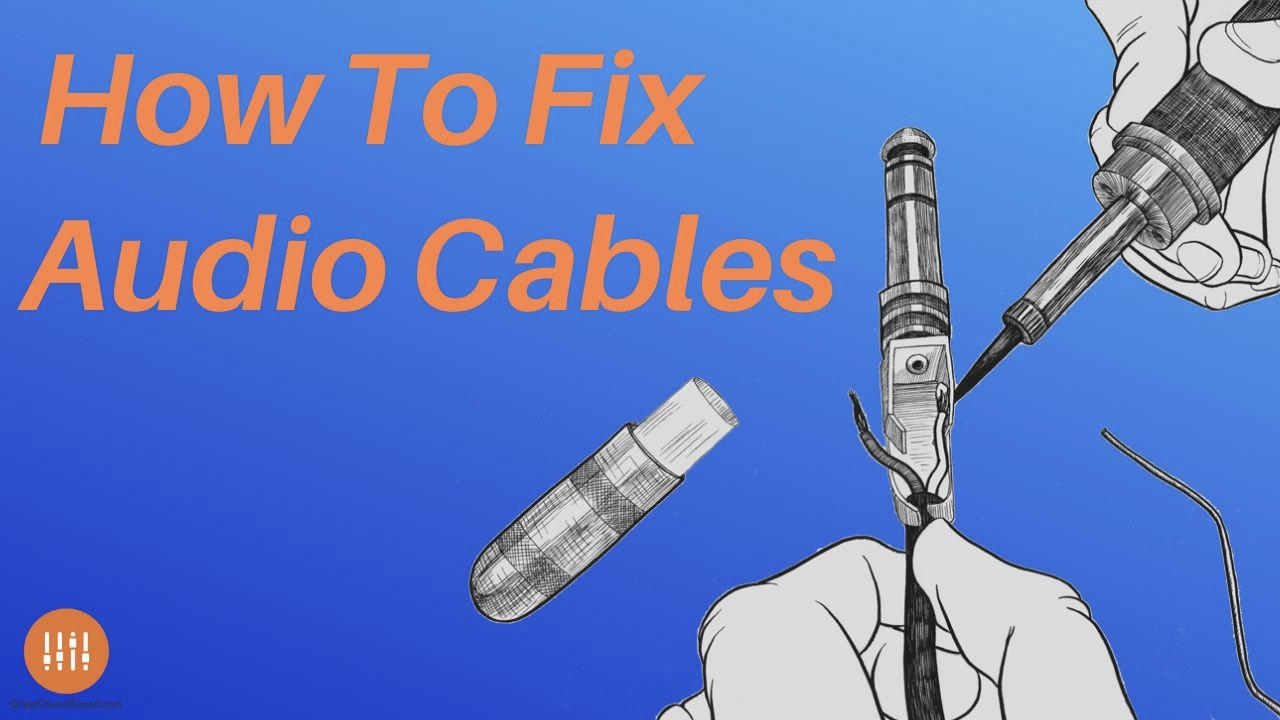
- Once you have the connector pulled apart, inspect each wire attachment point. Each wire should be firmly in place. You should physically move each conductor a little bit to ensure that it is fastened, as it can be easy to miss an intermittent connection that looks attached but is not.
Note: with previously repaired cables, the most common cause of failure is a “cold solder” joint. This happens when a wire is not properly “tinned”, or lightly coated with solder, and is instead directly applied to a connector and soldered in place. - Solder any loose connections (see instructions below). This may require stripping back more wire and re-soldering all wires in the connector, or simply reattaching a loose conductor.
- Inspect the connections again, then put the connector back together when everything is to your liking.
- Test the cable to ensure that your repair is complete and functional.
If you’ve never soldered a cable before or had a proper training, don’t worry. It’s actually pretty simple once you have the basic tools and follow the right techniques.
Download the free Sound Tech’s Guide to Soldering that includes this handy step-by-step chart.

Cable Repair 101
Here’s what you’re going to need for repairing your audio cable:
- soldering iron
- solder
- brass tip cleaner or damp sponge
- wire strippers
- pliers
- small screwdriver
- vise or clamp
It will also be helpful for you to have an electrical multimeter or an audio cable tester – or both. This will let you know whether your cables are good or bad in the first place.
(Note: the Amazon links included above are for professional quality tools. You can certainly get by with using lower cost tools for occasional use.)
Prepare your work surface. It is best to work on a bench or tabletop that is clean and uncluttered. If working on a delicate or finished surface, use a piece of metal, wood, or cardboard as your working surface so that any solder drips or splatters will not mar it. Good lighting is also helpful so that you can properly see the wire colors and adequately inspect all connection points.
Plug in your soldering iron and make sure that it is at a hot operating temperature. A 35-50 Watt soldering iron works great for most projects. The hotter irons (higher Wattage) are great for soldering heavy gauge speaker wires.
Have a damp cloth or sponge handy so that you can easily clean the tip of the soldering iron. A clean tip will allow for greater heat transfer and reduce any contaminants in the final solder joint.
Gently clamp the end of the unscrewed audio connector in a vise or other clamp. Vise Grips, pliers, and other tools can work when a vise is not available.
Strip back the ends of the conductors as needed. Do not strip off too much wire insulation though. 1/8" to 1/4" should be sufficient depending on the wire and connector type.
Twist each wire tightly so that there are no loose strands.
Tin the wire. Apply the hot iron to the individual cable conductor you wish to solder. Apply solder to the wire and make sure that a small amount of solder is equally coating all sides of the bare wire. Successfully completing this step will eliminate most cold solder joint failures.
Next, apply the iron to the metal part of the connector you wish to attach the wire. Let the iron heat up the metal for a moment, then apply solder to the connector until a small pool of solder is in the desired location.
Heat up the connector solder point and place the wire into the desired location. Make sure the melted solder pools around the wire and connection point.
Hold the wire in place while removing the iron from the connector and allow the solder joint to cool. You may need small pliers to hold the wire so that you don’t burn your fingers on this step.
Inspect the connection, solder any other conductors, and then replace the strain relief and connector casing. Test the cable with a cable tester to ensure all connections are intact and properly functioning.
Resources
Download the complete guide to cable repair and soldering for church sound techs.

Everything you need to get started soldering:
Please note that some of the links and discount codes included throughout this website are affiliate links and Great Church Sound and/or James Wasem will earn a commission if you decide to make a purchase. This is at no additional cost to you.
These are tools I personally have used or recommend because they are helpful and useful, not because of the commissions made if you decide to buy something.
Affiliate earnings and commissions help keep this site active and populated with fresh content. If you decide to purchase something through these links, I would like to say Thank You!
Author

James Wasem
Author
Audio Geek, Drummer, Pilot, Author, and someday I'll learn to play the hurdy-gurdy!
Stay connected with the latest tips and updates from Great Church Sound!
Great Deals for Great Sound
Some of the resources on this page are from select partners that are passionate about helping you deliver great church sound.
(Read the Sponsor & Affiliate Disclosure here.)


